Application Sign In
1. Type
the MPC URL (For Europe = https://mymaxprocloud.eu/MPC/Signin)
and (For North Americas= https://mymaxprocloud.com/MPC/Signin) in the
address bar, and then press Enter.
The MPC Welcome page appears.

2. Enter the registered Email Id and Password.
|
|
Note: |
|
It is recommended to select language at the bottom of the application based on the region. |
3. Click
SIGN IN.
A list, displaying the dealer name, location, number of associated customer,
dealer status, and dealer registration date appears.
To sign in with Corporate login enabled
|
|
Note: |
|
Before you sign in with Corporate login, ensure that you have sent an email to the MPC tech support team to enable the Corporate login account. |
1. Once the Corporate login account is enabled, an email notification is sent stating that "active directory" has been enabled.

2.
Type the MPC URL (For Europe
= https://mymaxprocloud.eu/MPC/Signin) and (For North Americas= https://mymaxprocloud.com/MPC/Signin)
in the address bar, and then press Enter.
The MPC Sign In page appears.
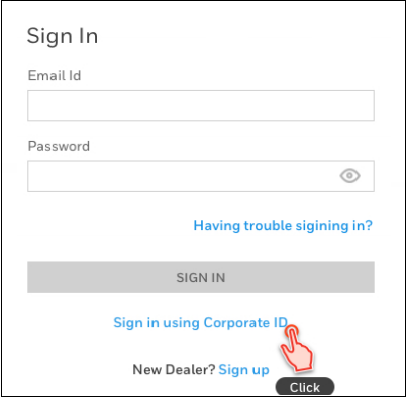
3. After
Active Directory is enabled, regular login will not work, and you should
click Sign in using Corporate ID.
The HONEYWELL FORGE page appears.
|
|
Note: |
|
The Honeywell FORGE page is the internal page that connects with the external active directory. This depends on the external active directory registration with MPC. |
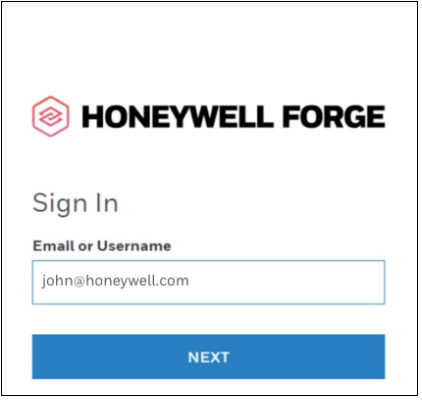
4. Enter
a valid Email or Username and
then click NEXT.
The Active Directory (OAuth) or
Active Directory Federation Services
(ADFS) associated with the respective corporate ID appears.
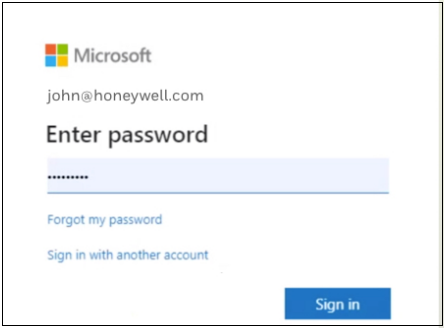
5. Enter password and then click Sign in.
|
|
Note: |
|
You are redirected to the Dashboard page.
Directory Type and Directory Services for Dealers
Setting the Directory Type and managing Directory Services are exclusive to Honeywell Tech support team.
To set the Directory Type
1. Click
![]() and
then click your name.
and
then click your name.
The Settings page appears.
2. Click Settings.
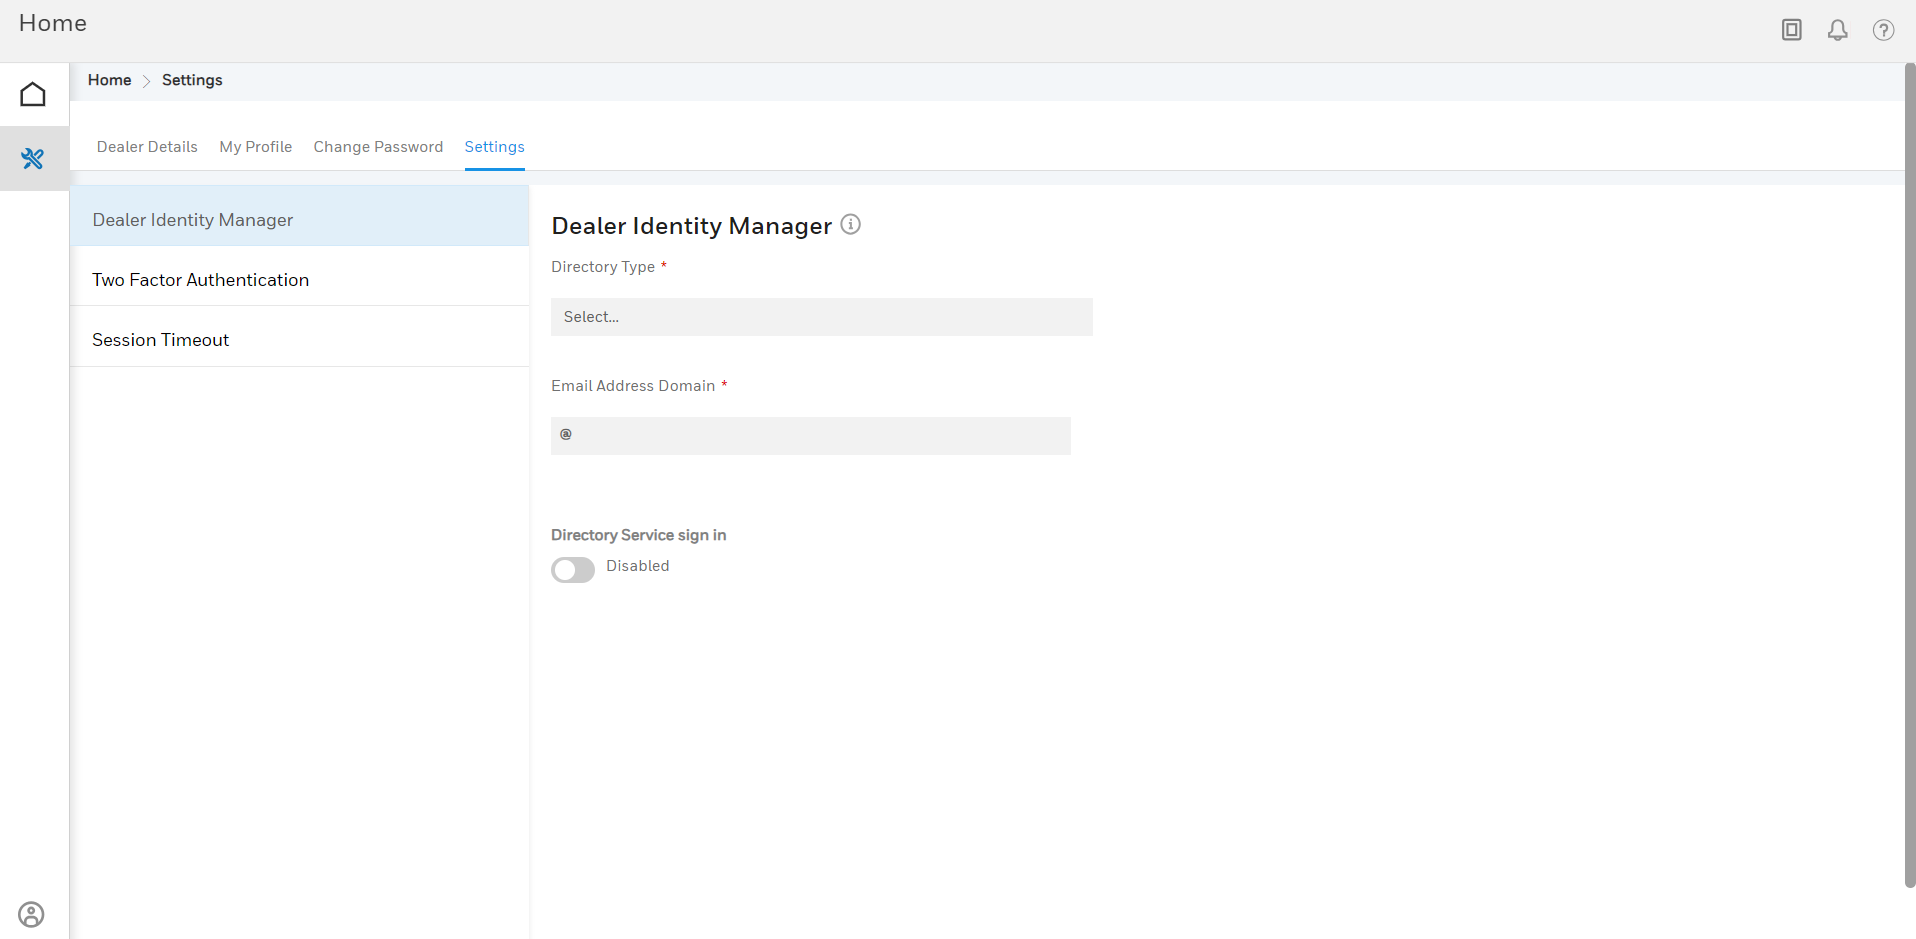
3. Under Dealer Identity Manager, you can set the following:
-
Directory Type: From the drop down list, click to select the type.
-
Email Address Domain: Type the email address specific to the domain.
-
Directory service sign in: Click to Enable.
To enable Directory Services with OAuth
1. Click
![]() and
then click your name.
and
then click your name.
The Settings page appears.
2. Click Settings.
3. Under Dealer Identity Manager, click Disabled in Directory Service Sign In.
3. Click ENABLE
in the message window that appears.
Once directory services are enabled, Two-Factor
Authentication and Password Reset
options are disabled.
Also, once you configure the Dealer Identity
Manager and Enable the
Directory Service Sign In, you
can now view the option to enable User
Management.
To enable Directory Services with ADFS
1.
Click ![]() and then click your name.
and then click your name.
The Settings page appears.
2. Click Settings.
3. Under Dealer Identity Manager, click Disabled in Directory Service Sign In.
3. Click ENABLE
in the message window that appears.
The Email address domain specifies
the domain such as ADFS domain to which you can connect.
Once directory services are enabled, Two-Factor
Authentication and Password Reset
options are disabled.
To disable Directory Services
1.
Click ![]() and then click your name.
and then click your name.
The Settings page appears.
2. Click Settings.
3. Under Dealer Identity Manager, click Enabled in Directory Service Sign In.
4. Click DISABLE
in the message window that appears.
Once directory services are disabled, Two-Factor
Authentication and Password Reset
options are enabled.
To enable User Management
1.
Click ![]() and then click your name.
and then click your name.
The Settings page appears.
2. Click Settings.
3. Under Dealer Identity Manager, click Disabled in User Management.

4. Click ENABLE
in the Enable user creation
window that appears.
Once the user management is enabled
-Dealer/Customer Admin has
the privilege to generate a token.
-You cannot Add/Delete a
user under Site Operators.
To generate a Token
1.
Click ![]() and then click your name.
and then click your name.
The Settings page appears.
2. Click Settings.
3. Under Dealer Identity Manager > User Management > Secret Token and Endpoint URL, click Token Expiration and select the total number of days up to which the token must be valid.
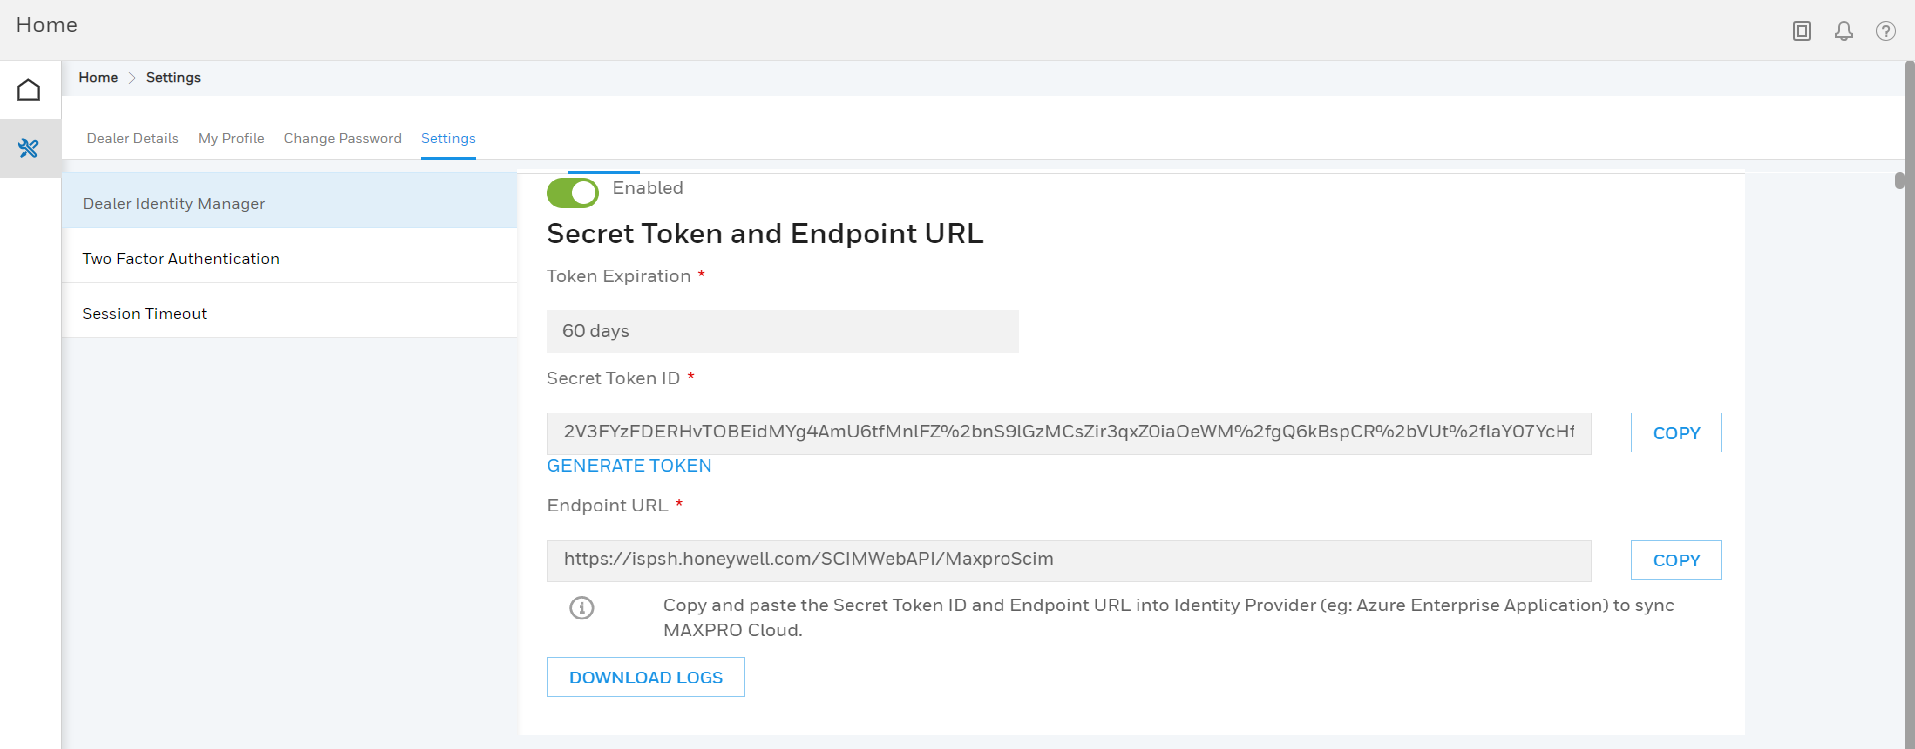
4. Click GENERATE TOKEN under Secret Token ID.
5. Click COPY
next to Secret Token ID field.
The copied Endpoint URL is used
for syncing the AD Users to MAXPRO Cloud.
Ensure to configure the URL and the secret token ID into the respective
Identity Provider. For example, Azure Enterprise application.
6. Click SAVE.
The copied token ID enables you to activate auto user provisioning.
|
|
Note: |
|
To Download Logs
1. Click ![]() and then click your name.
and then click your name.
The Settings page appears.
2. Click Settings.
3.
Under Dealer Identity Manager
> User Management, click DOWNLOAD
LOGS.
A report (in .csv format), containing the details
of user provisioning activity appears.
Directory Type and Directory Services for Customers
Setting the Directory Type and managing Directory Services are exclusive to Honeywell Tech support team.
To set the Directory Type
1. In
the home page, select the desired site or customer. From the left pane,
click ![]() .
The Global page appears.
.
The Global page appears.
2. Under Customer Details, click Configure.
3. Under Customer Overview > Settings > Customer Identity Manager, from the Directory Type drop down list, select the relevant Identity Management (IDM).

To enable Directory Services with OAuth
1. In
the home page, select the desired site or customer. From the left pane,
click ![]() .
The Global page appears.
.
The Global page appears.
2. Under Customer Details, click Configure.
3. Under Customer Overview > Settings > Customer Identity Manager, click Disabled in Directory Service Sign In.
4. Click ENABLE
in the message window that appears.
Once directory services are enabled, Two-Factor
Authentication and Password Reset
options are disabled.
Also, once you configure the Customer
Identity Manager and Enable the
Directory Service Sign In, you
can now view the option to enable User
Management.
To enable Directory Services with ADFS
1. In
the home page, select the desired site or customer. From the left pane,
click ![]() .
The Global page appears.
.
The Global page appears.
2. Under Customer Details, click Configure.
3. Under Customer Overview > Settings > Customer Identity Manager, click Disabled in Directory Service Sign In.
4. Click ENABLE
in the message window that appears.
The Email address domain specifies
the domain such as ADFS domain to which you can connect.
Once directory services are enabled, Two-Factor
Authentication and Password Reset
options are disabled.
To disable Directory Services
1. In
the home page, select the desired site or customer. From the left pane,
click ![]() .
The Global page appears.
.
The Global page appears.
2. Under Customer Details, click Configure.
3. Under Customer Overview > Settings > Customer Identity Manager, click Enabled in Directory Service Sign In.
4. Click DISABLE
in the message window that appears.
Once directory services are disabled, Two-Factor
Authentication and Password Reset
options are enabled.
To enable User Management
1. In
the home page, select the desired site or customer. From the left pane,
click ![]() .
The Global page appears.
.
The Global page appears.
2. Under Customer Details, click Configure.
3. Under Customer Overview > Settings > Customer Identity Manager, click Disabled in User Management.
4. Click ENABLE
in the Enable user creation
window that appears.
Once the user management is enabled
-Dealer/Customer Admin has
the privilege to generate a token.
-You cannot Add/Delete a
user under Site Operators.
To generate a Token
1. In
the home page, select the desired site or customer. From the left pane,
click ![]() .
The Global page appears.
.
The Global page appears.
2. Under Customer Details, click Configure.
3. Under Customer Overview > Settings > Customer Identity Manager > User Management > Secret Token and Endpoint URL, click Token Expiration and select the total number of days up to which the token must be valid

4. Click GENERATE TOKEN under Secret Token ID.
5. Click COPY
next to Secret Token ID field.
The copied Endpoint URL is used
for syncing the AD Users to MAXPRO Cloud.
Ensure to configure the URL and the secret token ID into the respective
Identity Provider. For example, Azure Enterprise application.
6. Click SAVE.
The copied token ID enables you to activate auto user provisioning.
|
|
Note: |
|
To reuse Dealer token
1. In
the home page, select the desired site or customer. From the left pane,
click ![]() .
The Global page appears.
.
The Global page appears.
2. Under Customer Details, click Configure.
3. Under Customer Overview > Settings > Customer Identity Manager > User Management, click Disabled under Reuse Dealer Token.
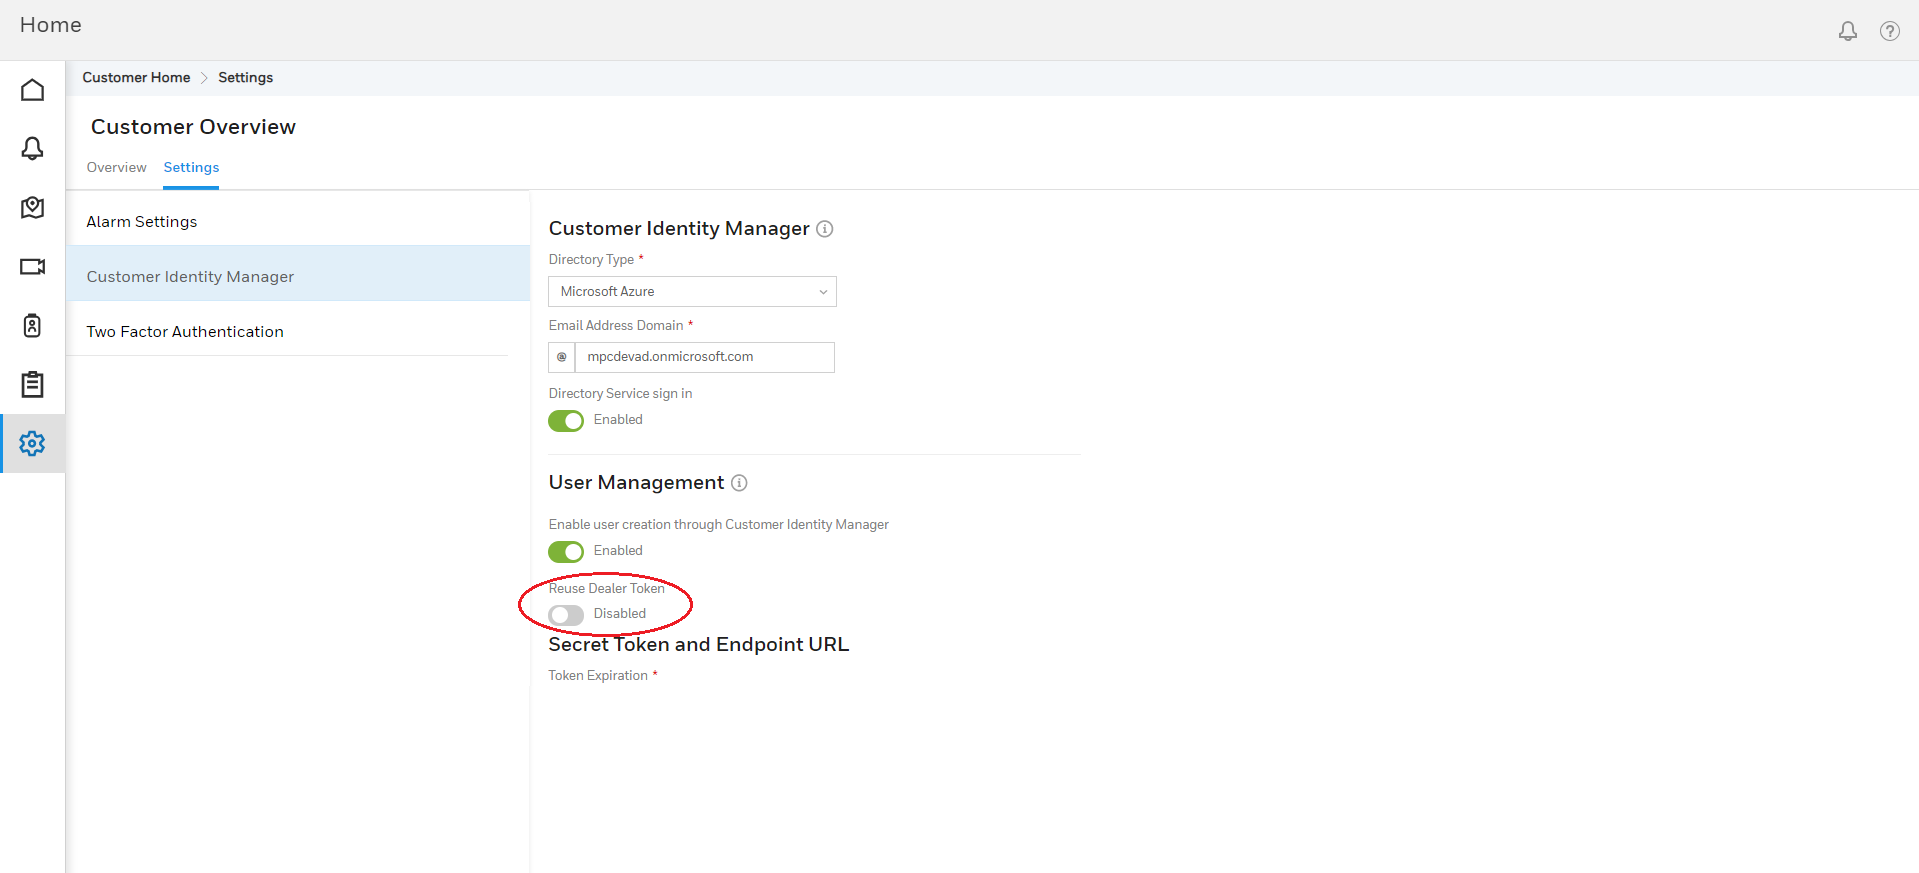
4. Once the Reuse
Dealer Token is enabled, the option to provide the Customer
Identifier appears.
You must ensure the value matches with the customer's unique identifier
that was generated while creating a user in the active directory.
To Download Logs
1. In
the home page, select the desired site or customer. From the left pane,
click ![]() .
The Global page appears.
.
The Global page appears.
2. Under Customer Details, click Configure.
3. Under Customer
Overview > Settings > Customer
Identity Manager > User Management,
click DOWNLOAD LOGS.
A report (in .csv format), containing the details
of user provisioning activity appears.
Login without active Multi Factor Authentication (MFA)
1. Type the MPC URL (For Europe = https://mymaxprocloud.eu/MPC/Signin) and (For North Americas= https://mymaxprocloud.com/MPC/Signin) in the address bar, and then press Enter.
2. In the Welcome screen, type the Email Id and Password and then click SIGN IN.
You can now edit and view details in the home screen.

Login with active Multi Factor Authentication (MFA)
Multi Factor Authentication adds an extra layer of protection to logins.
After you set it up, you will sign in to your account in two steps.
-
Enter your email address and password.
-
A security code will be sent to your registered email address.
|
|
Note: |
|
Ensure to enable and setup login details under User Profile option. |
Login via EMAIL
1. Type
the MPC URL (For Europe = https://mymaxprocloud.eu/MPC/Signin)
and (For North Americas= https://mymaxprocloud.com/MPC/Signin) in the
address bar, and then press Enter.
The MPC Welcome page appears.
2. Type the Email Id and Password and then click SIGN IN.
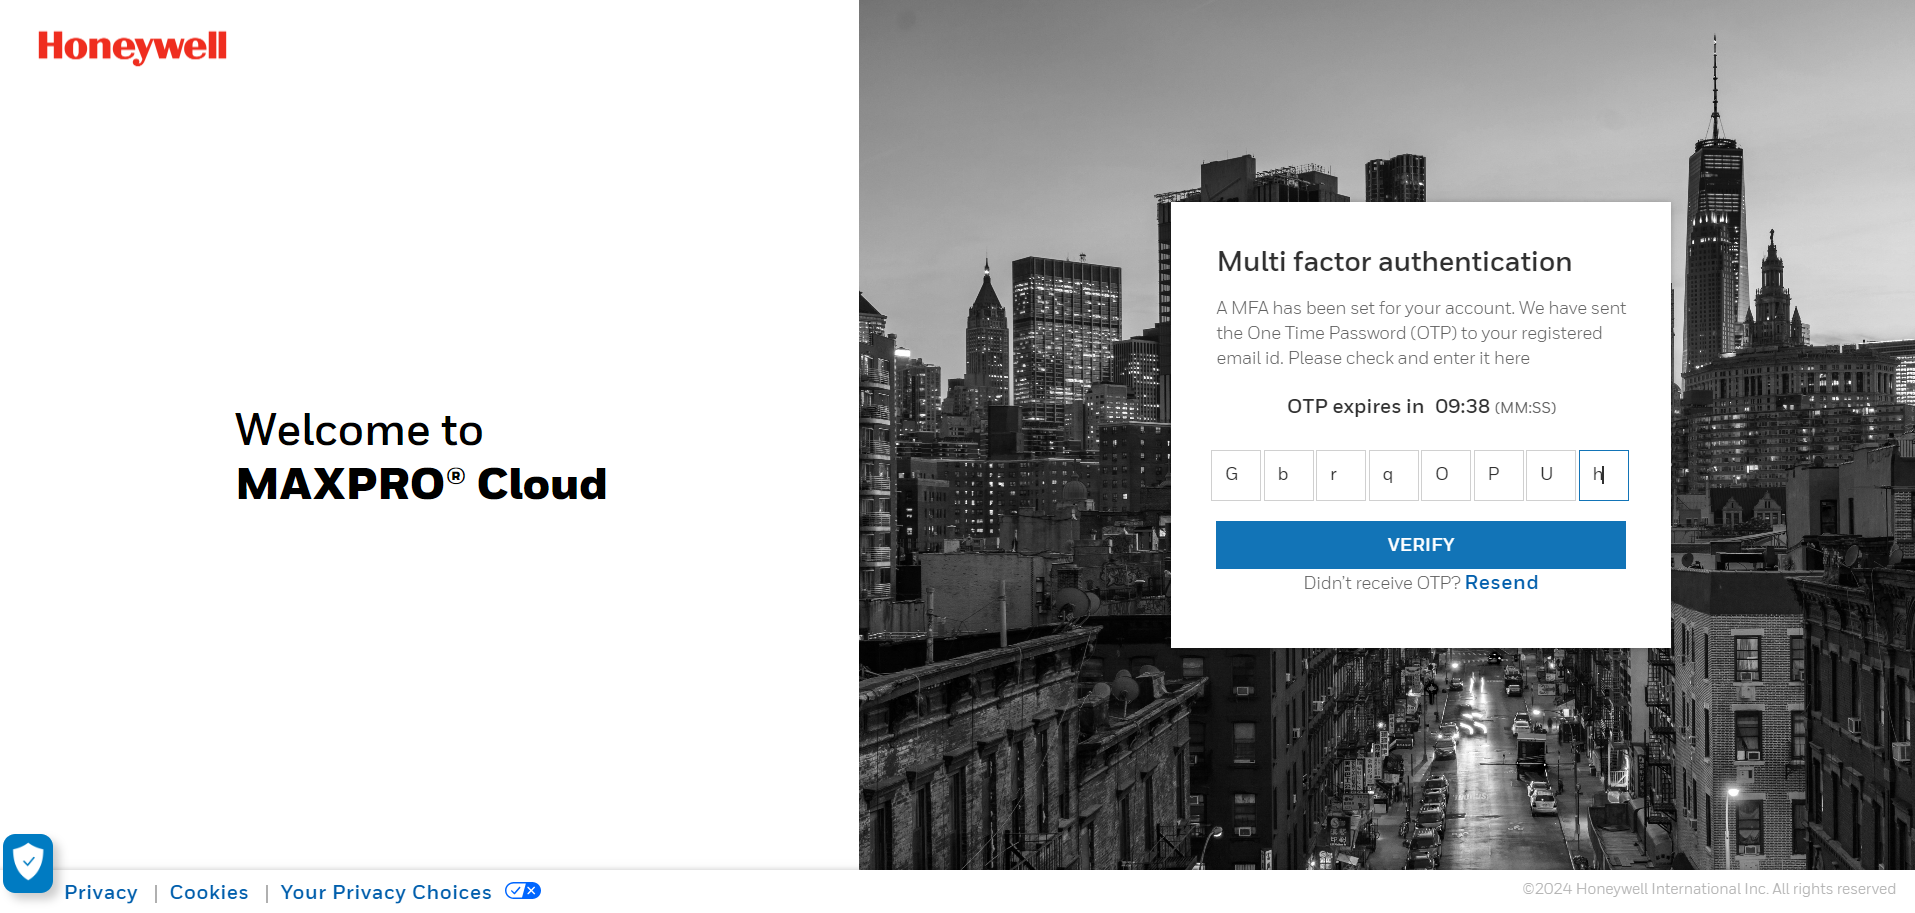
3. An email from MAXPRO® Cloud with One Time Password (OTP) is sent to your registered email ID.
4. In the Multi Factor Authentication page, you must Enter OTP. This OTP is valid only for 10 minutes.

|
|
Note: |
|
You can receive OTP's for a maximum of four times during a single login session. |
5. Click VERIFY.
6. The following messages appear:
-
Invalid OTP: When you have entered an incorrect OTP. Enter the correct OTP sent to your email address.
-
Verification Failed: When you have exceeded a maximum of four attempts to verify OTP for Multi Factor authentication, click OK to be redirected to Sign In screen.

Also, in case you have exceeded 10 minutes to verify OTP, you are again redirected to Sign In screen.
|
|
Note: |
|
7. Enter the verification code sent to your email address and then click VERIFY.
8. Once the OTP is verified, you can now view the home screen.
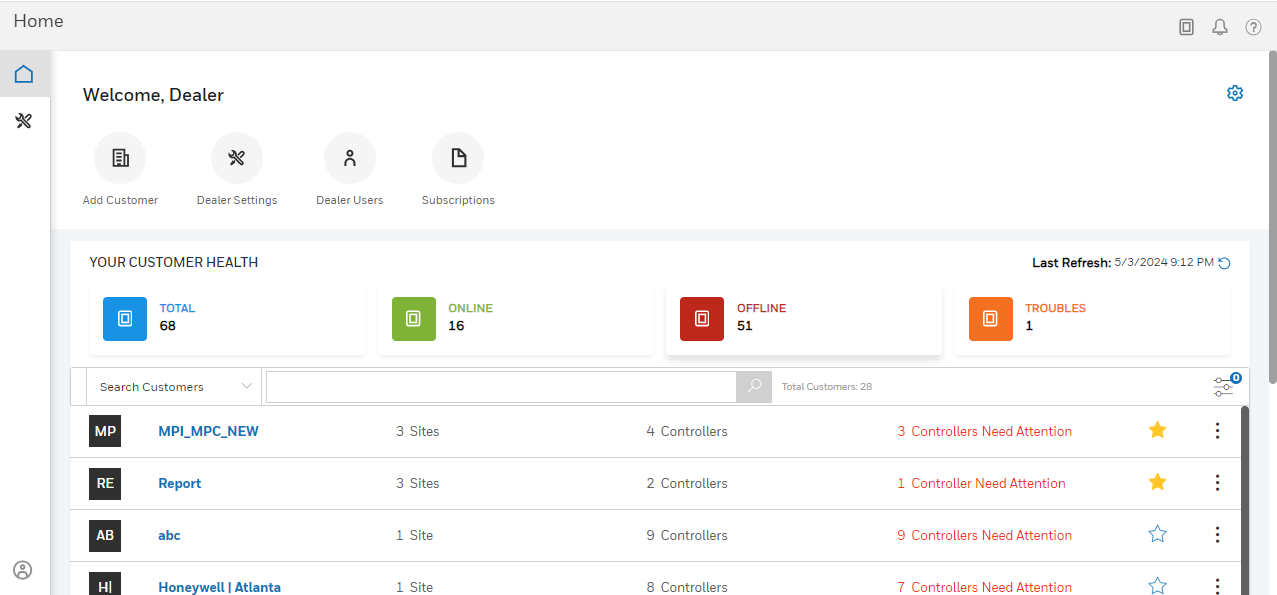
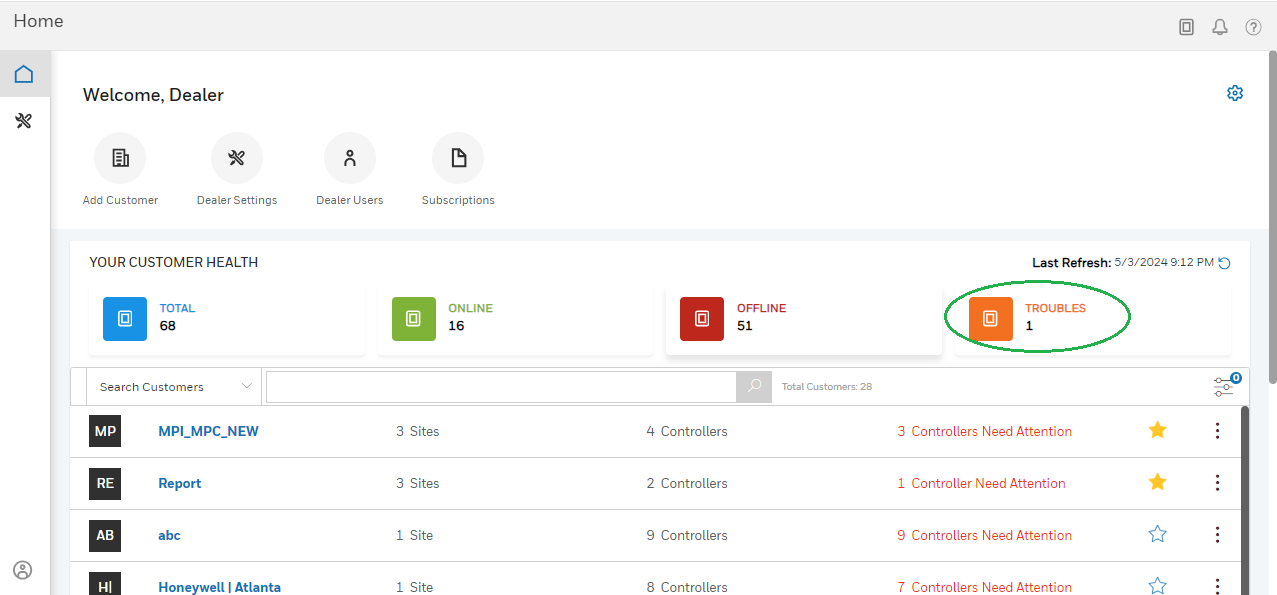
Dealer Home Screen
In the Dealer Home Screen,
|
Fields |
Description |
|---|---|
|
Under YOUR CUSTOMER HEALTH, you can click to filter and view:
|
 |
To View Controller Troubles
1. In the home screen, under YOUR CUSTOMER HEALTH, click TROUBLES.
2. Click Controller Need Attention.
3. Click ![]() to
view the list of troubles.
to
view the list of troubles.
To View Offline Controllers
1. In the home screen, under
YOUR CUSTOMER HEALTH, click OFFLINE.

2. You can:
-
View the list of offline controllers
-
Click controller need attention to view the offline controller list in the selected customer.
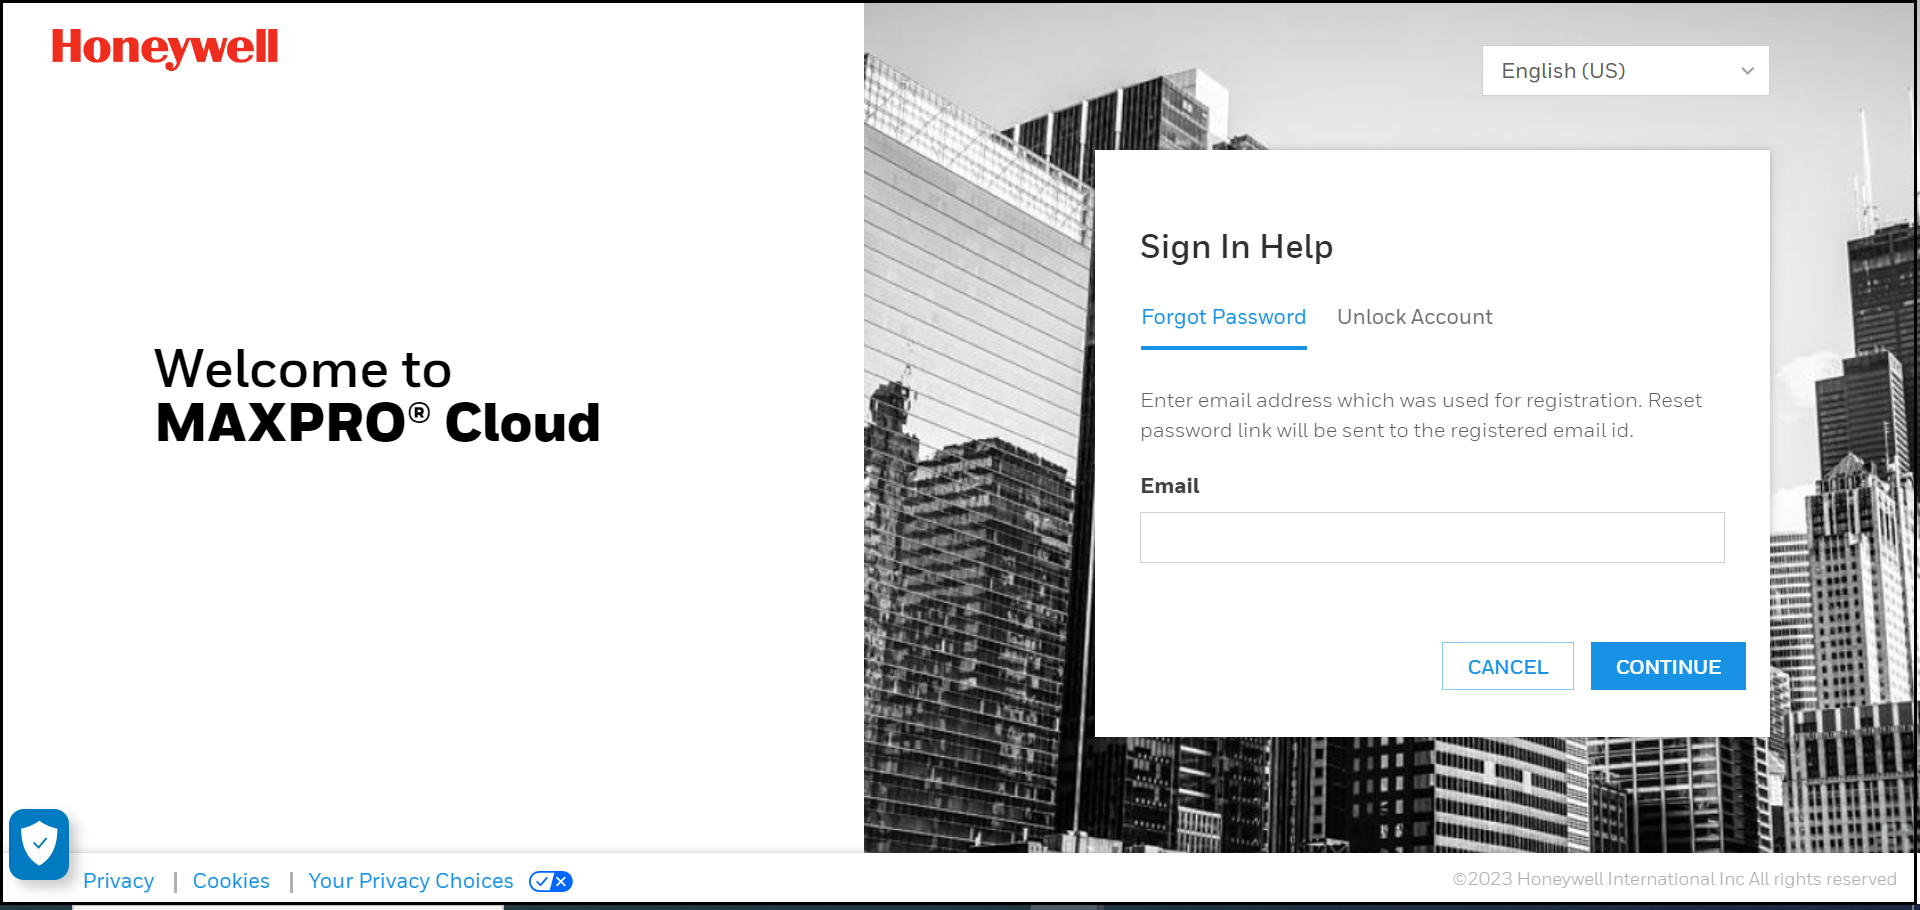
Forgot Password
1. Type
the MPC URL (For Europe = https://mymaxprocloud.eu/MPC/Signin)
and (For North Americas= https://mymaxprocloud.com/MPC/Signin) in the
address bar, and then press Enter.
The MPC Welcome page appears.
2. Click Forgot Password.
3. Type the registered Email ID to receive the reset password link.
4. In the Password Reset email, click to reset the password.

5. In the Reset Password screen, enter the New Password and then re-enter the password under Confirm Password.

6. Validate the password and then click SUBMIT.
|
|
Note: |
|
In case the Reset Password link has expired, click BACK TO LOGIN to reset.
|

Unlock Account
1. Type
the MPC URL (For Europe = https://mymaxprocloud.eu/MPC/Signin)
and (For North Americas= https://mymaxprocloud.com/MPC/Signin) in the
address bar, and then press Enter.
The MPC Welcome page appears.
2. Click Unlock Account.
3. Type the registered Email ID to receive the unlock account link.

4. In the Unlock Account email, click to unlock the account.
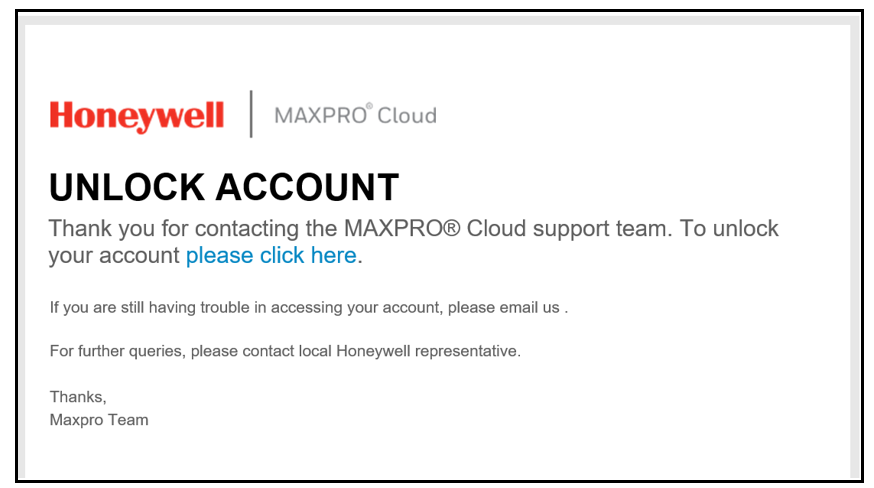
5. Click BACK TO LOGIN to be redirected to the SIGN-IN page.

Session timeout option enables you set a time duration after which the MPC application, if inactive, automatically logs out.
|
|
Note: |
|
Session timeout option is not applicable for AD users. |
1. Click![]() at
the bottom left corner of the Home
screen and then click My Profile.
at
the bottom left corner of the Home
screen and then click My Profile.
2. Under Home> My Profile > Settings > Session Timeout, click CHANGE under Session Timeout.

|
|
Note: |
|
If you have logged in with Operator credentials, you can access Session Timeout under Profile > Session Timeout. |
3. Click the Session Timeout Duration drop-down in the Change Session Timeout window that appears.

4. From the available options, you can choose to set the duration for inactive logout.
|
|
Note: |
|
Honeywell recommends you to retain the default duration. |
5. Click CONFIRM. A confirmation message appears.

6.You can click:
-
YES for the changes to be effective. You are signed out and redirected to the sign in page.
OR
-
NO to retain the previously set duration.
|
|
Note: |
|
When your login is continuously active for 12 hours and above, an automatic session timeout is initiated by the application as per security policy. |
|
|
Note: |
|
You must login with tech support credentials to access and modify the options available in the Utilities page. |
Dealers
1. Type
the MPC URL (For Europe = https://mymaxprocloud.eu/MPC/Signin)
and (For North Americas= https://mymaxprocloud.com/MPC/Signin) in the
address bar, and then press Enter.
The MPC Sign In page appears.
2. Enter a valid Email ID.
|
|
Note: |
|
Ensure to use the Email ID specific to tech support. |
3. Type the Password.
4. Click
SIGN IN.
The Utilities page appears.
5. You can click:
Pending: To view the list of dealers awaiting approval. You can click APPROVE to approve any pending dealers.
Approved: To view the list of approved dealers. You can click SAVE to save any modifications.
6. Under Approved, The Utilities page in appears.
Billing
1. Type
the MPC URL (For Europe = https://mymaxprocloud.eu/MPC/Signin)
and (For North Americas= https://mymaxprocloud.com/MPC/Signin) in the
address bar, and then press Enter.
The MPC Sign In page appears.
2. Login with tech support credentials.
3. Click
SIGN IN.
The Utilities page in appears.
4. Under Billing, you can click to view the EU and NA billing formats.
Agreement Update
1. Type
the MPC URL (For Europe = https://mymaxprocloud.eu/MPC/Signin)
and (For North Americas= https://mymaxprocloud.com/MPC/Signin) in the
address bar, and then press Enter.
The MPC Sign In page appears.
2. Login with tech support credentials.
3. Type the Password.
4. Click
SIGN IN.
The Utilities page in appears.
5. Under
Agreement
Update,
enter the following details.
|
Fields |
Description |
|---|---|
|
AGREEMENT TEXT |
First name of the Dealer representative. |
|
Agreement Type |
From the drop down list, select EULA or SLA as desired. |
|
Country |
From the drop down list, click to select the desired a single country or multiple countries to configure the agreement for. |
|
Language |
From the drop down list, click to select the language(s) supported by the selected country. |
|
Start Date |
Click |
 to set the start date for the agreement.
6. Click SAVE.
Data Privacy
1. Type
the MPC URL (For Europe = https://mymaxprocloud.eu/MPC/Signin)
and (For North Americas= https://mymaxprocloud.com/MPC/Signin) in the
address bar, and then press Enter.
The MPC Sign In page appears.
2. Login with tech support credentials.
3. Type the Password.
4. Click
SIGN IN.
The Utilities page in appears.
5. From the Request Type drop down, if you select Incident, the following fields are listed.
|
Fields |
Description |
|---|---|
|
Customer |
Click the drop down and type a name to search. From the populated list, select the desired customer. |
|
Sites |
Click the drop down and type a name to search. From the populated list, select the desired site associated to the previously selected customer. |
|
Include clip archival |
Select to enable archiving the clips for the selected customer and site. You must enter the following details:
|
|
Reference No |
Type the reference number for the incident. |
|
Description |
Type a description for the selected incident. |
6. From the Request Type drop down, if you select Data Request, the following fields are listed.
|
Fields |
Description |
|---|---|
|
Customer |
Click the drop down and type a name to search. From the populated list, select the desired customer. |
|
Sites |
Click the drop down and type a name to search. From the populated list, select the desired site associated to the previously selected customer. |
|
New Data Request |
Click to enable creating a new data request. |
|
Retrieval |
Click to enable video retrieval for the selected site and customer. |
|
Include clip archival |
Select to enable archiving the clips for the selected customer and site. You must enter the following details:
|
|
Reference No |
Type the reference number for the data request. |
|
Description |
Type a description for the data request. |
7. Click SAVE for New Data Request or click RETRIEVE for Retrieval.
Announcement
1. Type
the MPC URL (For Europe = https://mymaxprocloud.eu/MPC/Signin)
and (For North Americas= https://mymaxprocloud.com/MPC/Signin) in the
address bar, and then press Enter.
The MPC Sign In page appears.
2. Login with tech support credentials.
3. Type the Password.
4. Click
SIGN IN.
The Utilities page appears.
5. Under Announcement, you can enter the following details.
|
Fields |
Description |
|---|---|
|
Recipient Group |
Click the drop down to set the announcements to a specific group. You can select from the following list:
NOTE: Click to set the recipient group as High Priority. |
|
Announcement Starts |
Click NOTE: You can click Now to instantly activate the announcement. |
|
Announcement Ends |
Click |
|
Language |
From the drop down list, select to set the language. NOTE: The default language is English.
To create variants, click Add
language |
|
Message title |
Type a title for the announcement. |
|
Message body |
Type the content for the announcement. |
 .
.6. You can either click
-
SAVE and publish later
OR
-
PUBLISH to publish immediately.
Users
This option is available only when you login with Tech Support credentials. The Users tab lists only the Super Dealers. For more information on Super Dealer, refer to Super Dealer.
To add a user
1. Type
the MPC URL (For Europe = https://mymaxprocloud.eu/MPC/Signin)
and (For North Americas= https://mymaxprocloud.com/MPC/Signin) in the
address bar, and then press Enter.
The MPC Sign In page appears.
2. Login with tech support credentials.
3. Type the Password.
4. Click
SIGN IN.
The Utilities page appears.
5. Under
Users, click ![]() .
.
The User Details screen appears
in the right pane.
6. Click the image layout to browse and upload the user picture.
|
|
Note: |
|
The supported image formats are .JPG, .JPEG, .PNG, and .GIF, with a maximum size limit of 512 KB. |
7. Enter the User Details.
|
|
Note: |
|
Enter a valid Primary Email, you cannot edit it in the future. If you enter incorrect Primary Email for any reason, then the user must be deleted and re-added. |
8. Type
a Super
Dealer Account.
You need to enter alphanumeric characters, with a maximum limit of 20 characters.
This will be used for billing aggregation under Monthly
Billing Reports.
|
|
Note: |
|
The default Honeywell reference number is used during automated Monthly Billing Reports generation when there are no super dealers present in the selected account. Click to view a sample report for NA region. |

9. Under Permissions,
a. Select Super
Dealer.
|
|
Note: |
|
The Super dealer role enables the dealer to manage separate individual dealers who are working independently. |
b. Select the Dealer(s) which the dealer super dealer can manage and control.
10. Under Contact, enter the details.
11. Click SAVE.
To edit a user
1. In the Utilities page, select the user that you want to modify.
2. Click
![]() .
.
3. Modify the details.
|
|
Note: |
|
You cannot modify the e-mail ID in the Primary Email field. |
4. Click SAVE.
To delete a user
1. In the Utilities page, select the user that you want to modify.
2. In the left pane, select a user that you want to delete.
3. Click
![]() .
.
A confirmation message appears.
4. Click YES.
Search
This option is available only when you login with Tech Support credentials. The Search tab enables you to perform a search for an user using email ID or perform a search for a device using MAC ID.
To search by an email ID:
1. In
the Utilities
page,
select the Search tab.

2. From the drop-down list, select User.
3. In the next field, type the email ID and then click SEARCH. The user details are displayed on the screen.
To search by a MAC ID:
1. In
the Utilities
page,
select the Search tab.
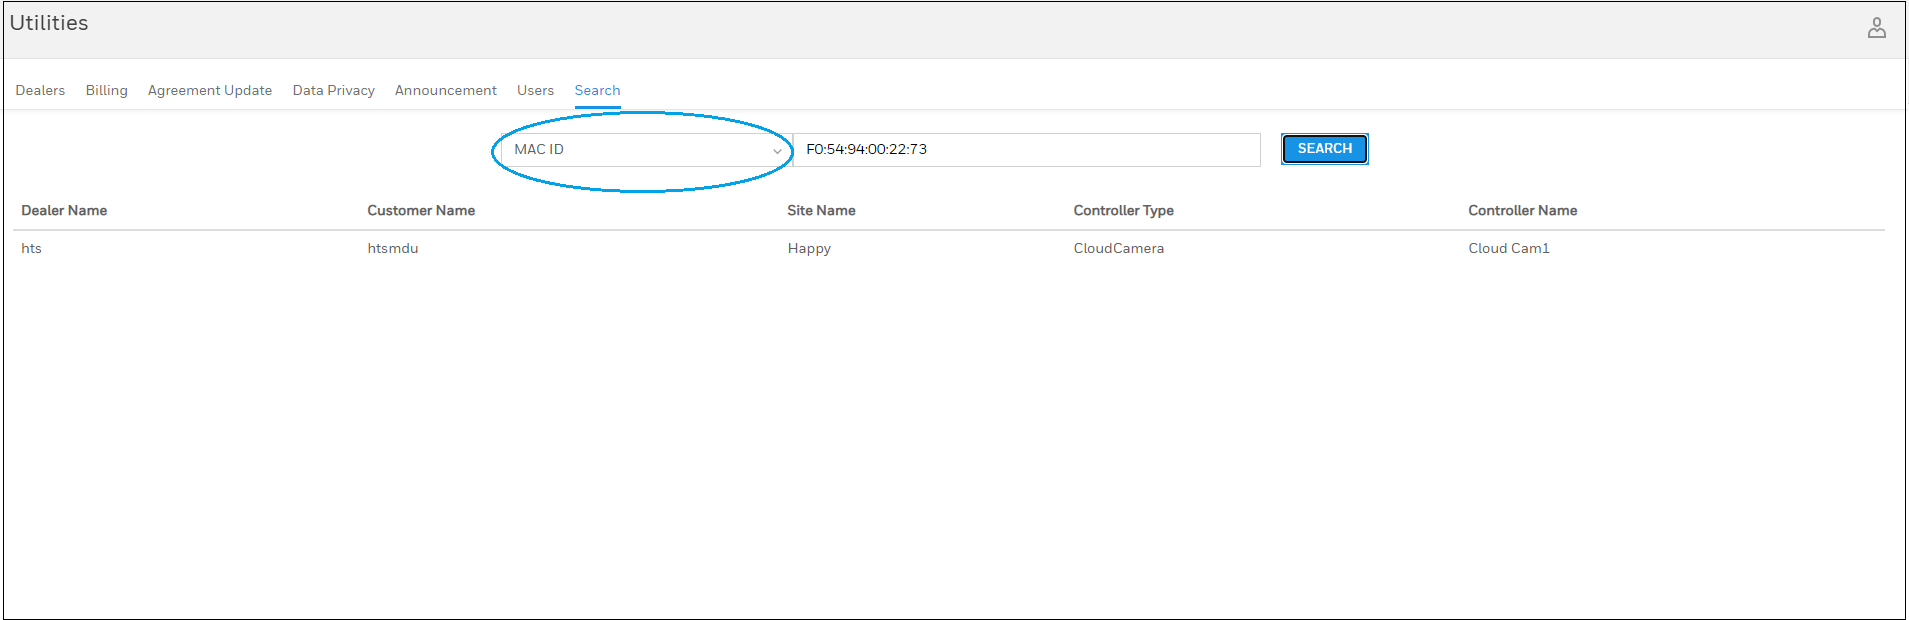
2. From the drop-down list, select MAC ID.
3. In the next field, type the MAC ID and then click SEARCH. The user details are displayed on the screen.
A Super Dealer is a Dealer User who has access to multiple dealers.
To create or delete a Super Dealer User, you must place an offline request to the Tech Support team and ensure to provide the following information.
-
The list of dealer accounts to be grouped.
-
Super Dealer Account: This is likely the Honeywell reference number for the Corporate account. This will be used for billing aggregation under Monthly Billing Reports.
When you login as a Super Dealer User, you can:
-
View the list of dealers associated with the super dealer user.
-
Click the desired dealer. You are then redirected to the Dealer Overview page.
The following table lists few can-do and can't-do options.
|
Can-Do |
Can't-Do |
|---|---|
|
View all the associated dealers, panels, dashboards, people, reports, and so on. |
Add or modify people, permission group, site operators. |
|
Add Controllers and Settings |
Panel actions on Visual Management and Viewer as the user is not downloaded as a Remote User. |
|
Acknowledge Alarms |
Edit My Company |
|
|
Note: |
|
Also, when the Monthly Billing Reports are generated, the field Description , which appears in the report, is renamed with the name provided in the Super Dealer Name field present under Utilities > Users > User Details. |
Checking reader for mobile key
|
|
Note: |
|
1. Download and sign-up to access the HID reader manager app.
2. Inspect the reader.
3. In the Inspection
Report screen, under Administration
Configuration, check for keys in Mobile
Admin and Mobile Access.
The key begins with text MOBXXXX

|
|
Note: |
|
If you do not have the mobile keys configured, refer to Creating New Template to configure the reader with Mobile key. |
Viewing authorized keys on a reader
|
|
Note: |
|
The following procedure is applicable if you have a HID SIGNO/Honeywell Omni smart reader. |
1. Login to the HID reader manager App.
|
|
Note: |
|
2. On the Home screen, tap the Settings icon.
3. Under Administration Keys, tap SHOW AUTHORIZED KEYS to display authorized keys in the user account .
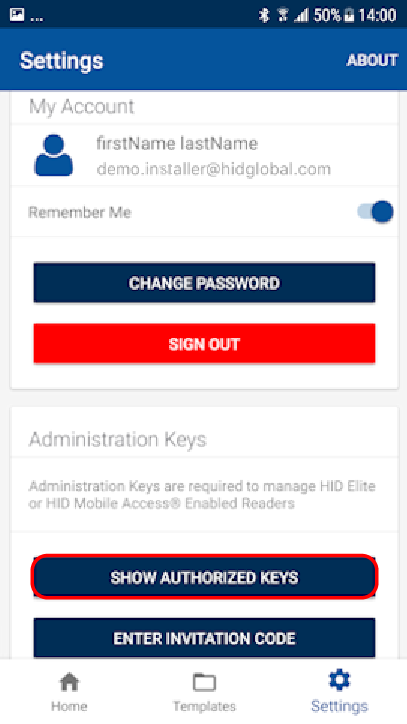
4. Check if the authorized mobile key is available.
.png)
If not, you need to obtain the key from HID Reader Manager app.
|
|
Note: |
|
For more information on obtaining the key from HID Reader Manager App, you must: 1. Install the HID Reader Manager App and sign-up. 2. Send an e-mail to HID. 3. You will receive an invitation code. The invitation code is a one time use code. 4. Open the invitation email on the device and tap the invitation link. The invitation code will be automatically entered in the HID Reader Manager App. Alternatively, manually enter the invitation code by tapping ENTER INVITATION CODE on the Settings screen. 5. Check if the mobile key is listed. |
Templates store reader configuration settings. When a template is created, it can be applied to multiple readers, of the same model, that require the same configuration or shared with other Technicians to speed up the configuration of multiple readers.
|
|
Note: |
|
The following procedure is applicable if you have a HID SIGNO/Honeywell Omni smart reader. |
1. Login to the HID reader manager App.
2. On the Home
screen, tap the Templates icon
and on the Templates screen, tap
the plus icon [![]() ].
].

3. Tap in the READER TYPE field and select a reader type from the displayed list.
4. Tap in the CREDENTIAL PROFILE field and select a credential profile from the displayed list.
5. If applicable enable the KEYPAD option. Tap OK.
6. From the Build Template screen you can configure and add settings to a template. Templates only need to include the reader settings that are applicable to the selected reader type.

7. From the CREDENTIAL DETAILS section, tap Credentials.
8. Select the desired HID Mobile Access option.
9. Enable/disable the required credential types.
10. Tap ADD TO THE TEMPLATE to save.
11. From the CREDENTIAL DETAILS section, tap Keys.

12. In the Keys section, tap ADD KEYS.
13. Select an authorization key to load onto the reader (only one key can be loaded). The selected authorization key will be displayed on the screen.
14. Tap ADD TO THE TEMPLATE to save.
15. Now inspect the reader, then select the template which has the Mobile Key and other parameters added. You can then download to reader.